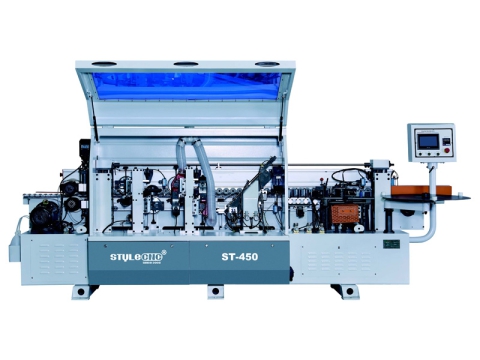
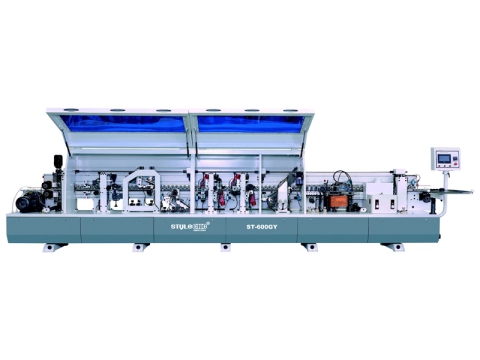
Are you planning to buy an affordable edge bander machine to custom decorative edges to boost your furniture making business?
Here is a practical guide on how to choose your first or next edge banding machine. We'll go through all the machine types, features, configurations, costs, as well as some optional items to make your purchasing decision easier. Let's dive in.
What Is An Edge Banding Machine?
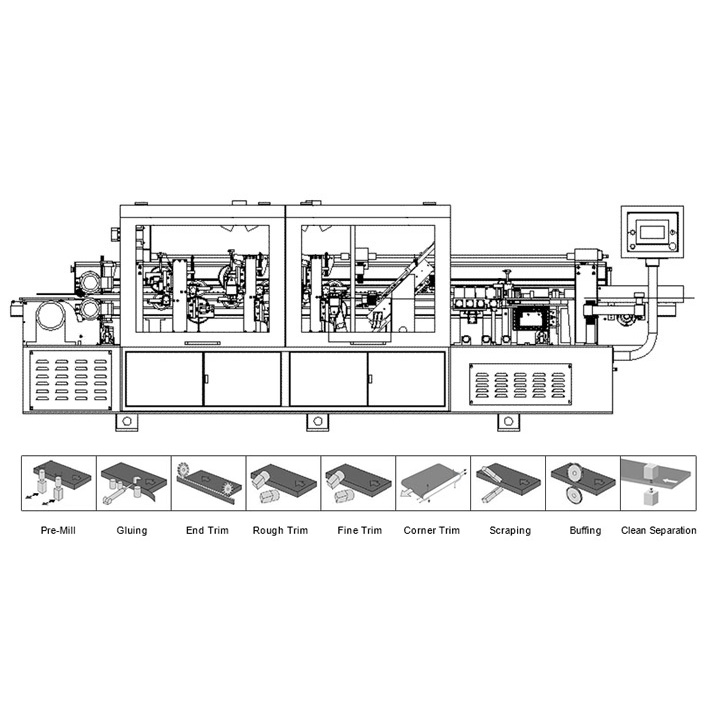
An edge banding machine is an automated woodworking tool kit that carries out pre-milling, gluing, end trimming, rough trimming, fine trimming, corner trimming, scraping, cleaning separation for cabinets and furniture making. The automatic edge bander is designed for straight edge banding and trimming of MDF (medium density fiberboard), blockboard, solid wood board, particle board, polymer door panel, melamine, and plywood.
Abilities
Automatic edge banding machines are used to pre-mill, bond the edge banner to the substrate, trim the leading and trailing edges, trim top and bottom flush with the substrate, scrape any surplus, and buff the finished edge. All works will be finished in one machine, which is an upgraded version of the traditional manual edge banding in modern furniture making.
Pre-Milling
The corrugated marks, burrs or non-perpendicular phenomena caused by the panel saw or slitting saw are re-modified with double milling cutters to achieve a better sealing effect. It makes the bonding between the edge band and the plate more closely, and the integrity and aesthetics are better.
Gluing
With the special structure, the sealing board and edge banner are bonded on both sides to ensure stronger adhesion.
End Trimming
Through precise linear guide motion, automatic mold tracking and high-frequency high-speed motor fast cutting structure are adopted to ensure that the cut surface is smooth.
Fine Trimming
All adopt the automatic tracking of the mold and the high-frequency high-speed motor structure to ensure the smoothness of the upper and lower parts of the trimmed panel. It is used to repair the excess material up and down the strip of the processed sheet. The finishing tool is an R-shaped bit, which is mainly used for PVC and acrylic strips of panel furniture, preferably edge strips with a thickness of more than 0.8mm.
Scraping
It is used to eliminate the ripple marks caused by the cutting process of the non-linear motion of trimming, so that the upper and lower parts of the plate are smoother and neater.
Buffing
Clean the processed panel with a cotton polishing wheel, and polish the end face of the edge banding to be smoother.
Slotting
It is used for direct grooving of wardrobe side panels, bottom panels, and it is more convenient and quick to reduce the process of panel sawing. It can also be used for the slotting of the aluminum edging of the door panel.
Applications
Edge banders are used for making decorative edges on panels and boards (MDF, blockboard, particle board, solid wood board, melamine, polymer door panel, and plywood) automatically with the edge banners made of melamine, PVC, ABS, PMMA, and acrylic.
Types
Portable Handheld Edge Bander
The portable handheld edge bander can be applied to the operation of plate straight and curved irregular borders. When the machine is installed with the fixed bracket accessories, its use method is similar to that of the traditional curved line manual edge bander. It is suitable for banding of various materials, including melamine (impregnated) paper, veneer, plastic (PVC or ABS).
Semi-Automatic Edge Bander
The semi-automatic edge banding machine is suitable for straight edge banding of MDF, blockboard and particleboard. Its capabilities include gluing, sealing, upper and lower trimming, and polishing. It is an automatic production line that can complete the conveying of panel, edge banding, upper & lower milling, and polishing at one time.
Automatic Edge Bander
The automatic edge banding machine is suitable for straight banding & trimming of solid wood, fiberboard, particleboard, MDF, plywood. The materials can be solid wood strips, PVC, melamine, and veneer. Its capabilities include pre-milling, gluing, banding, leveling, roughing, finishing, profiling, scraping, polishing, grooving.
Pricing
The price of the edge banding machine varies according to the configuration. The best budget portable handheld edge banders start around $600. The affordable semi-automatic edge bander machines are priced from $5,500 up to $7,200, while some can be as expensive as $9,800. An industrial automatic edge banding machine costs from $8,000 up to $32,800.
Buyer's Guide
The edge bander is a power tool with automatic electrical control and programmed operation. It should be carefully reviewed when buying.
Understanding
Listening to the manufacturer's product introduction, you can have a general perceptual understanding of the required machine from the specifications, performance, scope of use, operation method, price, service & support.
Inspection
Check to see if the appearance of the machine is in good condition. Check whether the parts are complete, watch the manufacturer's operation demonstration video, check the bonding effect, and master the essentials of operation.
Testing
Turn on the machine for a test run. Check whether the power supply and air supply lines are smooth and sensitive, and whether it runs smoothly and without noise. On this basis, the user decides whether to buy or not.
How To Use An Automatic Edge Bander?
The novices tend to be in a hurry when using automatic edge banders, so how to avoid this phenomenon so that the beginners can use it better?
Before use, we need to keep it clean, check the condition of the parts, and the use of the edge sealant so as to control and adjust.
Here are 8 easy-to-follow steps.
Step 1. First, choose the strip that corresponds to the color of the sheet.
Step 2. Put the strip on the turntable, and pull the interface of the strip into the machine.
Step 3. Take the sheet to the working table.
Step 4. Press the board and slowly push it into the machine.
Step 5. When it is pushed halfway, you can let go, and the guide conveyor belt will automatically bring the plate forward to seal the edge.
Step 6. The board is automatically sealed, and the excess part of the strip is cut.
Step 7. Then receive the edge-sealed sheet at the end.
Step 8. After finishing the board, you can go to the next process, and the edge sealing is over.
Care & Maintainance
An automatic edge banding machine needs to be maintained in daily use to prevent failures. Regular care and maintenance can effectively prolong the life of the machine, reduce the maintenance cost of the enterprise, improve work efficiency, and greatly help the long-term development of the enterprise.
So how should we carry out the maintenance work? STYLECNC lists 8 tips you should keep to take care of your automatic edge bander.
Tip 1. Regular Lubrication.
Add lubricating oil to the bearings of each part, and be sure to choose the appropriate lubricating oil, otherwise it will also affect the normal use of the machine.
Tip 2. Periodic Inspection.
During the maintenance process, carefully check the wear of the gears, bearings and other parts, and replace the severely worn parts in time. Once found, tighten them immediately, and replace the screws if necessary. The role of the circuit in the operation is also very important, so the inspection of the circuit must not be ignored.
Tip 3. Clean Up In Time.
The first thing to clean up is the waste and various sundries generated during the working process, so as to prevent the machine from being stuck due to the accumulation of waste and affect the work efficiency. The second is to clean up all kinds of stains on the surface, keep beautiful and tidy, and prevent the stains from corroding the surface.
Tip 4. Timely Removal.
Remove waste from around the automatic edge bander and keep the operating area clean.
Tip 5. Glue Amount Adjustment.
The amount of glue applied and the temperature of use should be adjusted according to the thickness, width and size of the workpiece, as well as the heating capacity of the automatic edge bander itself.
Tip 6. Regularly Clean The Glue Pot.
Prevent long-term high-temperature heating from forming carbon deposits, which will affect the normal heating effect of the equipment.
Tip 7. Regularly Clean The Back Glue Port.
The glue return port should be kept unblocked, otherwise the lower mouth of the workpiece will be dirty, which will affect the quality. At the same time, the glue will also be attached to the conveyor belt and the travel switch, causing the travel switch to malfunction and damage the workpiece and equipment.
Tip 8. Maintain Proper Workshop Temperature.
The temperature of the automatic edge bander should not be too high or too low during the working process. Too low temperature will cause the oil to freeze and the machine cannot operate normally, and too high temperature will easily cause heat discharge inconvenience, which will cause damage to the motor.
Repair & Troubleshooting
Fault 1. There is a problem with the pressing part, which leads to abnormal operation of the trimming and polishing equipment. If the plate is not pressed tightly, or there are heights in the front and back of the pressing vertical plate, when the plate advances to the glued part, due to the pressure applied to the side of the plate by the gluing wheel and the pressing wheel, the plate will be displaced and deviate from the reference line, resulting in Subsequent processes cannot be completed.
Solution: Press the plate tightly, and the front and rear tightness are consistent, then lean the reference ruler and profiling wheel of the trimming tool against the plate, and finally adjust the tool until the desired effect, and the problem will be solved.
Fault 2. Your trimming reference plane does not find the board surface. The trimming knife can accurately trim the strip to an ideal line thanks to the horizontal ruler (oblique pressing wheel or arc leaning plate) and vertical ruler (profiling wheel) next to the trimming knife. If they can't cling to the moving plate, it is bound to not be able to repair a suitable line.
Solution: Send a long plate with a flat end surface into the machine (be careful not to apply glue), and stop the conveyor belt when the plate travels to the position where it can cover polishing, scraping, finishing, and rough repairing. Take the board surface as the benchmark, lean the above-mentioned horizontal and vertical reference parts against the board, put the tool close to the edge of the board, and wait for fine-tuning later until the desired effect appears.
Fault 3. The trimming is unstable due to loose screws.
Solution: Find the benchmark, tighten the screw, and adjust the tool. Of course, when it comes to this, you may ask, why didn’t you talk about polishing? If you haven’t repaired the trimming, why talk about polishing? I believe you can solve the problem of trimming, and the polishing will be done easily. After all, polishing is simple and there is no what precision to speak of is not.
Fault 4. The descending speed of the rear head is too fast or the downward air pressure is too high, causing the ruler to collide with the board and cause the phenomenon of knocking the board.
Solution: Adjust the inlet/exhaust pressure regulating valve of the rear cylinder to reduce the speed and force of the downward movement of the cylinder.
Fault 5. The upward pressure of the front head is too large, and the problem occurs when the board advances to this point and hits the front head.
Solution: Adjust the pressure of the front pressure regulating valve to make it softer.
Fault 6. The position of the travel switch of the down signal of the front head is wrong or broken. If the travel switch is not touched or the switch is broken when the plate travels to the predetermined position, then there will be no downward signal of the front head, so it will Nibbling board.
Solution: Adjust the position of the travel switch or replace it.
Fault 7. The missing of the guide wheel of the head-to-head ruler causes the board to be cracked by the ruler.
Solution: Install new guide wheels.
Fault 8. There are burrs on the contact surface of the headrest ruler.
Solution: Rub off with fine gauze.
Fault 9. Electrical Faults: Including machine stop, slow heating, program disorder. If not eliminated in time, the motor and heating tube will be burned out, and even the entire mechanical system will be damaged. You can check the motor, electric control box and delayer by yourself during maintenance. You can also request professionals or manufacturers to do this maintenance.
Fault 10. Pneumatic Circuit Faults: Including air valve failure, air leakage, low air pressure, cutter and feeding failure. Check the integrity of various pneumatic components, and replace parts can be carried out under the guidance of the manufacturer's technical personnel.
Fault 11. Mechanical Faults: Transmission failure, uneven glue coating, feeding failure and cutter failure. Check the integrity and firmness of each mechanical component, and whether the transmission part is offset.
Fault 12. Adhesive Faults: Such as not sticking, deviation, entrainment, this is a comprehensive failure, related to rubber shaft, banding, sol, substrate and operation. This kind of fault may appear alternately, or may appear singly, and the specific maintenance depends on the situation.
Things To Consider
If a thick edge banner is used for banding, the tightness of the pressing roller of the edge banding machine should be adjusted to the best position. The most common fault is to press too tightly. Since the banner is slightly longer than the workpiece, when the pressing roller presses the long part of the banner, a force perpendicular to the feeding direction is applied to the banner. At this time, since the glue is not fully cured, the bonding strength is not high. The tail is easy to loose and not sticky.
The indoor temperature should not be too low during processing. Generally, it should be above 15°C. Especially when the edge band is thick, the flexibility will be insufficient. It is necessary to ensure the normal operation of the preheating device. If there is no preheating device, a hair dryer can also be used for heating. The method softens the edge band, which is especially suitable for curved edges. There shall be no ambiguity in the processing workshop.
The quality of the edge-sealing tape affects the edge-sealing effect. The products sealed with the good-quality edge-sealing tape are tightly sealed, and the products sealed with the poor-quality sealing tape have a larger gap, and there is an obvious black line. When the machine is trimming, the backer is easy to scratch the surface. From the cross-section of the thick edge banding, the middle part of the glued surface should be slightly more concave than the two sides.
The moisture content of solid wood edge banding materials should not be too high, and should be stored in a cool and dry room.
The amount of hot melt adhesive applied should be based on the glue that is slightly extruded from the outside of the glued parts. If it is too large, there will be a black line, which will affect the appearance. If it is too small, the bonding strength will not be enough. In order to check whether the adhesive film is continuous, it can be tested with a transparent hard PVC tape, or a common edge band can be used to seal the edge.


